Gallery

Wednesday, March 12, 2014

Fringe Flowers.....


Happy Wednesday all!....I thought l would share some playtime l had on the weekend using the Stampin Up Fringe Scissors. I was looking at some punched circles laying on my desk and with the Fringe Scissors in my hand from a different project, it occurred to me they might work as a layered almost Gerbera style flower.
This is the result..."I like it"  So of course l needed to make some different colour ways, this one is Raspberry Ripple and Primrose Petals.
The yellow one is made with Crushed Curry & So Saffron, l liked the idea of two tone for a variegated look.


I thought l would provide a quick how to picture tutorial, for anyone that wants to try...:0)

The punch sizes l used are...2-1/2"  1-3/4"  1-3/8" & 1/2"


Once you get to this point, you layer one on top of the other, off setting the petals and then just fluff away until you're happy with the look...:0)

"Thanks for stopping by"
All supplies used are Stampin Up!

Tuesday, March 11, 2014

Washi Tape Pyramid Roll Up!.....


Evening all!...I had so much fun making this cute little project, the design of the boxes is the brainchild of Tanya Bell, she has some really fun and clever ideas and Lot's of tutorials on her blog. This one was definitely $2.50 well spent and l thoroughly enjoyed putting it together.
The non SU "Washi Tape" that I've used was a Kris Kringle gift and this project is for the person that gave it to me, it's very sweet and coordinated with the SU cardstocks perfectly.
I couldn't resist using the Spiral flower die as an embellishment on the scalloped tag, as it carried the rose theme from the tape to tie in the outside sleeve.


This next pic shows the boxes all rolled up inside the sleeve...very cute!


These little pyramids are a decent size and fit chocolates, lip balm, nail polish and many other things.

Thanks for stopping by"
All supplies used are Stampin Up unless noted!

Sunday, March 9, 2014

Make a Wish!....


Hello all!....I've been trying to plan out my card creations of late, to coincide with upcoming birthdays and although I'm covering most, l needed a young teen boy card and had nothing l felt was suitable. So l inked up the "Simply Stars" set in some bold colours and angle cut some layers, added in some silver foil cardstock and went to town with some SU star punches...Super quick!
The greeting is from the Banners bundle and l love the big bold font, it's perfect for this style of card, not too fussy for a young teen!


"Thanks for stopping by & enjoy your day"
All supplies used are Stampin Up!

Friday, March 7, 2014

Just Add Ink #205......Sunburst Challenge!


Can you believe it's already a week into March?....It won't be long and we'll all be Christmas shopping..lol, it's scary how fast this year is going, but at least March is still warm & sunny here and l guess that's a good lead into this weeks Just Add Ink challenge! 

Tina thought it would be fun to add "Sunburst's to our projects this week and it was! I had in my mind a sponged sunray effect, so decided to create another stencil using window sheet and my craft knife and this is the result, not a spot of blood to be seen...:0) Usually l'm a little nervous using the knife, after taking a nice slice off my finger during one of my crafty sessions, l think l was most devastated that l'd dripped on my project...lol
Anyway, onto this weeks project..........


The design team have some fab "Sunburst" creations to inspire you, don't forget to pop over to the challenge blog and take a look and hopefully you can join us this week.

"Thanks for stopping by"
All supplies used are Stampin Up!

Thursday, March 6, 2014

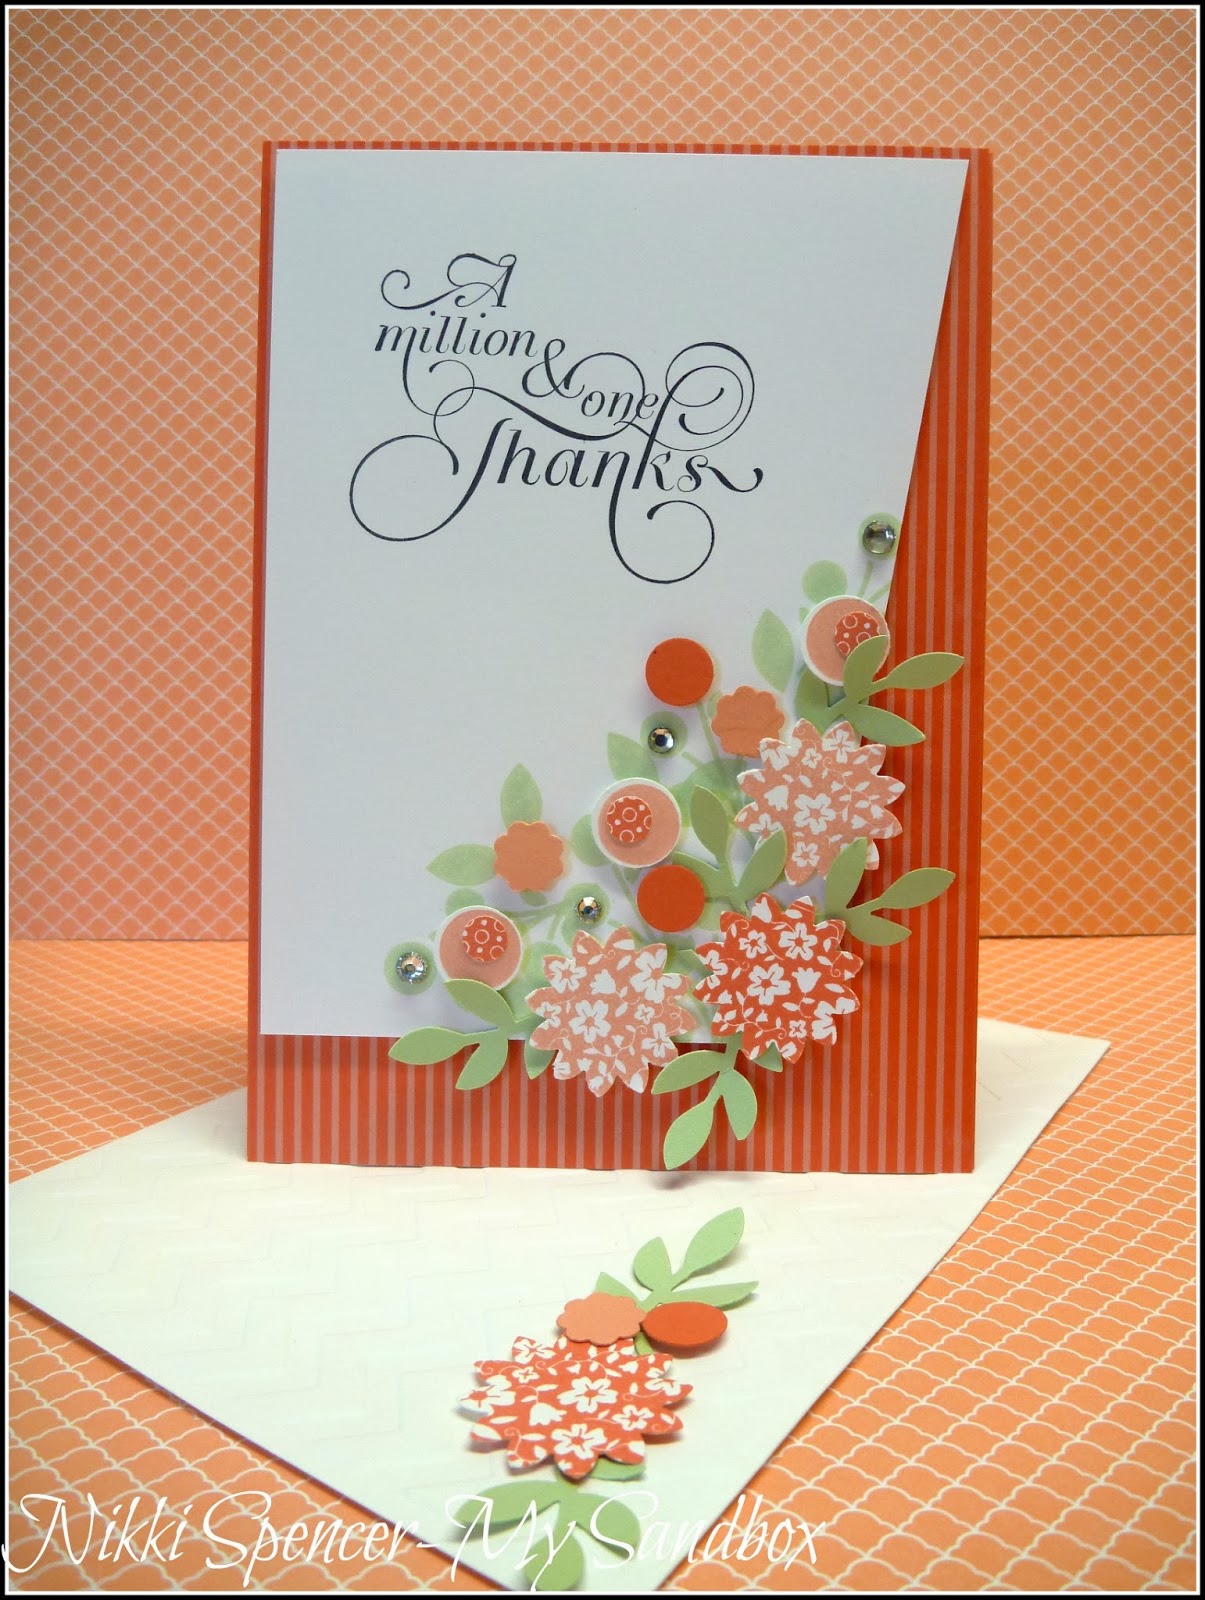
A Million & One Thanks!....


Morning everyone! Todays share is a thank you card l made the other day. I wanted to create a card with small floral images or the effect of them and didn't have anything that was small and dainty. So l pulled out the "bright blossoms" & "Six Sided" sampler sets and the Boho, Itty Bitty & Circle punches and just stamped, punched and rearranged until l was happy with the look. 
It was a little fiddly, but l like how it turned out and think l need to try it in a different colour way.


"Thanks for stopping by"
All supplies used are Stampin Up!

Wednesday, March 5, 2014

Fringe Scissor Gift Topper!....


Hey there!....Just popped in to show you this fun gift topper l made with the "Fringe Scissors" from SU and some leftover Christmas tissue paper...it only took half a sheet and was really simple to construct!
There are heaps of tutorials on YouTube that show you how it's done, plus heaps of other ideas made with them.
The box is up cycled packaging that usually gets crushed and as l love recycling and it's a really good size, it was perfect for this large topper. I was given a big stack of them from a friend that rescued them from her workplace...lucky me! 


"I've had so many emails asking how l created the topper, so l have added a step by step pic tutorial below"

1. Using a half sheet of tissue paper, add tape along one long side.....

2. Fold tissue in half attaching it to taped edge......and add another strip of tape on top.

3. Fold into thirds lengthwise and attach.....

4. Fold bottom edge of the tissue to meet the top edge....effectively creating 3 double layers and add another tape strip directly on top of the other 2 strips...it will be at the bottom edge now. Do not remove tape cover.
 Now you should have 2 folds at the top and the 3 taped layers at the bottom...

5. Using the "Fringe Scissors" start cutting through all top folded layers, working from one end along, cutting down to the taped area, but not through it..:0)

6. Once you have completed the cutting, remove the tape cover and using a skewer or similar, start rolling, keeping the taped edge tight and as straight as possible.
7. Once the rolling is complete, gently remove the skewer and using a hot glue gun, attach it to a 1-3/4" punched circle, this will keep it together and add stability when attaching it to your gift.

Hopefully this all makes sense and you will be producing beautiful gift toppers in no time...:0)

"Thanks for stopping by"
All supplies used are Stampin Up unless noted!

Tuesday, March 4, 2014

Scalloped Tag Topper Boxes!....


Good Morning!....I have two very sweet little gift boxes to share today. They are made with the Scalloped Tag Topper & Angled Tag Topper Punches. 
For the measurements, l used this tutorial Here, shared by Oxana. I've also added the imperial measurement conversion below. I had Lot's of fun decorating them, it's so cute and simple and could be used for so many occasions. I paired them with the Flower Shop & Petite Petals Bundles and the colours l used are Rose Red & Pink Pirouette and Perfect Plum & Crushed Curry.
I will definitely be making some more, as they fit 2 Soy Candle Melts perfectly....which is another of my fave things to make..:0)


Imperial Measurements:
Cardstock 8.1/4" x 5.1/2"
Along the 8.1/4" side Score @ 1.3/4" - 2.1/2" - 5.3/4" - 6.1/2" 
Rotate cardstock and Score @ 1" - 1.3/4" - 3.3/4" & 4.1/2"

"Thanks for stopping by"
All supplies used are Stampin Up!

Sunday, March 2, 2014

Kind & Cozy.....4" x 4" Gift Card!


Happy weekend everyone!.....I hope you are all enjoying your Sunday. I've had a lovely weekend going solo, the man is away on his annual brother/boys trip, so I've had Lot's of playtime and pottered around the house enjoying the peace...:0) The pooch and l have enjoyed some big walks and are settling in for a movie afternoon awaiting his return.

My card today is made with the cute little flower image from the "Kind & Cozy" set from Stampin Up, l used my markers to colour direct to the image and stamped repetitively after punching with the 2.1/2" circle punch, but keeping it in place while l stamped. I love how sweet and dainty it is!


"Thanks for stopping by"
All supplies used are Stampin Up!