

Thought l would share a pic of my display board flowers, with colour comparison strips below each one.

So, as promised l have a very simple step by step to show you how l made them....they are very simple!
Step 1: Punch 10 Mosaic shapes and sponge with co-ordinating ink as shown

Step 2: Using your stylus or piercing tool, roll each shape around the slimmer end to form a tube shape.

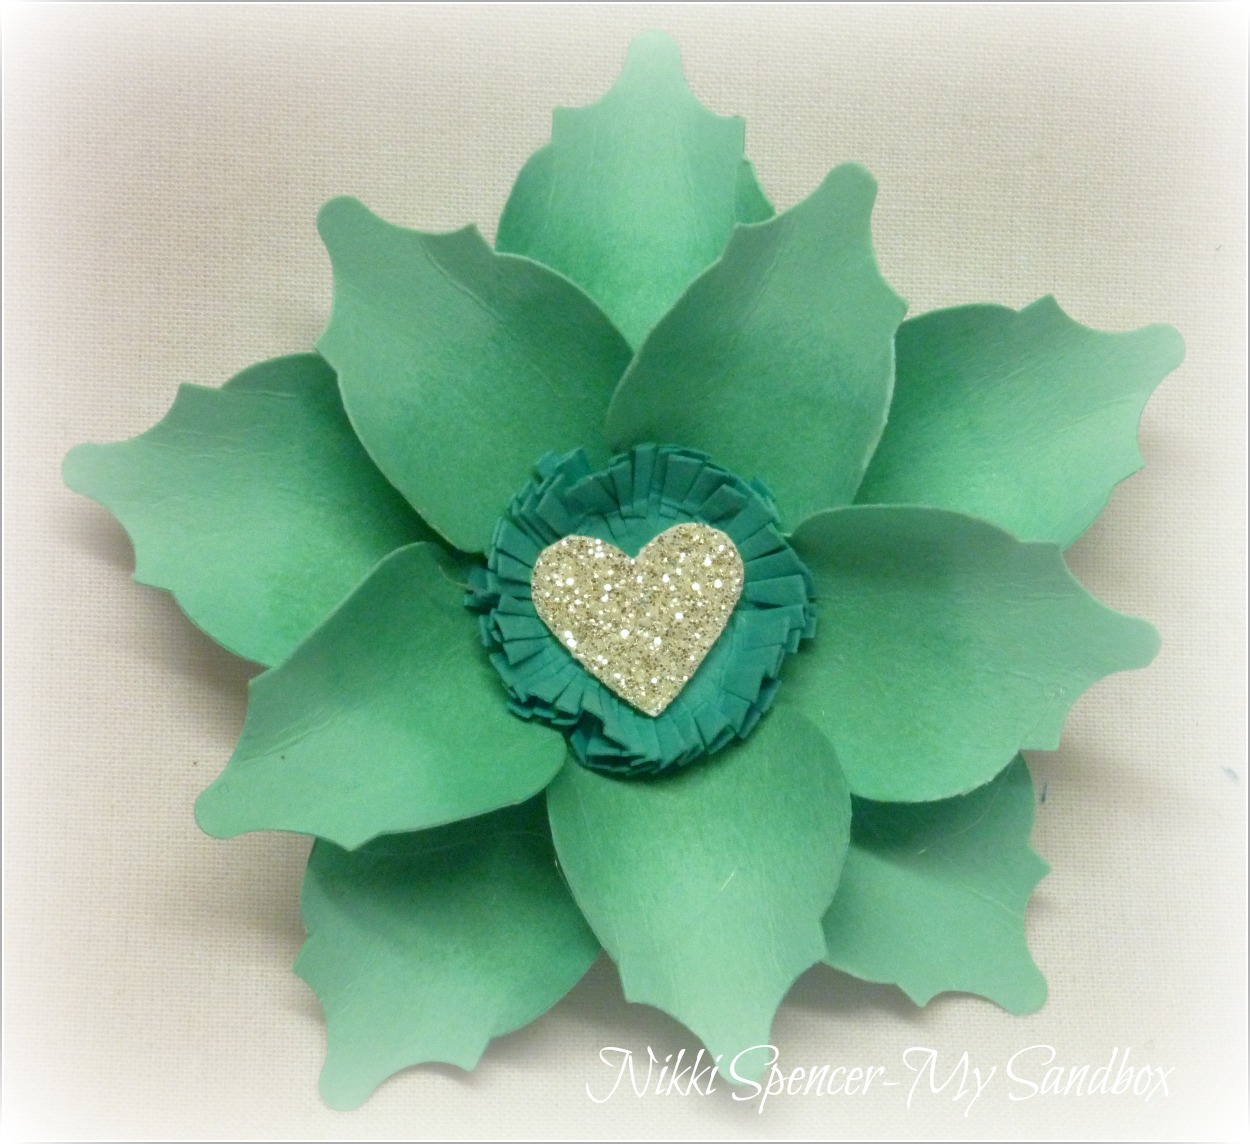
Step 3: Punch out 1x 1-3/8" circle & 2x 1" circles.

Step 4: Using a small piece of tape, join the two 1" circles together in the center and snip all around the edge to create your flower center. You can also sponge the edges at this point.

Step 5: Using a hot melt glue gun and the larger circle, attach the first row of 5 petals in what l call the person shape..head-arms-legs...:0)

Step 6: Repeat with the last 5 petals slightly in towards the center and in between the other petals.

Step 7: The final step is to add your 1" circle piece and any embellishment to the center and a magnet if you wish.
I'm thinking they would look awesome in "Red" for a Christmas Poinsettia, must try that next...:0)
"Thanks for stopping by & enjoy"

All supplies used are Stampin-Up
(Magnet from craft shop)
AMAZING!!!! Thanks you for sharing! :) ~ Chan
ReplyDeleteWonderful!!! Great job!
ReplyDeleteGreat idea and yes, thy would make grat poinsettias.
ReplyDeleteMary
Nikki thank you so much for the inspiration to make these flowers. I found them when I was browsing pinterest, but when I made my card couldnt remember where I saw them so couldnt give credit where it was due. I have just written a post and given you credit for the inspiration. You can see it at www.gwenscardsnstampsinbloom.blogspot.com.au Thanks again Nikki and sorry I didnt give you acknowledgement when I first posted.
ReplyDelete